Je fais un petit brouillon de mon installation :
- Ubuntu 18.04.4 LTS
- Kernel 5.4.0-42-generic (uname -a)
- Python 3.6.9 (python3 –version)
- Jupyter Notebook 6.1.4
- OpenCV : 3.2.0
ii  libopencv-calib3d3.2:amd64         3.2.0+dfsg-4ubuntu0.1   amd64        computer vision Camera Calibration library
ii  libopencv-contrib3.2:amd64         3.2.0+dfsg-4ubuntu0.1   amd64        computer vision contrlib library
ii  libopencv-core3.2:amd64            3.2.0+dfsg-4ubuntu0.1   amd64        computer vision core library
ii  libopencv-features2d3.2:amd64      3.2.0+dfsg-4ubuntu0.1   amd64        computer vision Feature Detection and Descriptor Extraction library
ii  libopencv-flann3.2:amd64           3.2.0+dfsg-4ubuntu0.1   amd64        computer vision Clustering and Search in Multi-Dimensional spaces library
ii  libopencv-highgui3.2:amd64                    3.2.0+dfsg-4ubuntu0.1   amd64        computer vision High-level GUI and Media I/O library
ii  libopencv-imgcodecs3.2:amd64                  3.2.0+dfsg-4ubuntu0.1   amd64        computer vision Image Codecs library
ii  libopencv-imgproc3.2:amd64                    3.2.0+dfsg-4ubuntu0.1   amd64        computer vision Image Processing library
ii  libopencv-ml3.2:amd64                         3.2.0+dfsg-4ubuntu0.1   amd64        computer vision Machine Learning library
ii  libopencv-objdetect3.2:amd64                  3.2.0+dfsg-4ubuntu0.1   amd64        computer vision Object Detection library
ii  libopencv-photo3.2:amd64                      3.2.0+dfsg-4ubuntu0.1   amd64        computer vision computational photography library
ii  libopencv-shape3.2:amd64                      3.2.0+dfsg-4ubuntu0.1   amd64        computer vision shape descriptors and matchers library
ii  libopencv-stitching3.2:amd64      3.2.0+dfsg-4ubuntu0.1   amd64        computer vision image stitching library
ii  libopencv-superres3.2:amd64       3.2.0+dfsg-4ubuntu0.1   amd64        computer vision Super Resolution library
ii  libopencv-video3.2:amd64          3.2.0+dfsg-4ubuntu0.1   amd64        computer vision Video analysis library
ii  libopencv-videoio3.2:amd64        3.2.0+dfsg-4ubuntu0.1   amd64        computer vision Video I/O library
ii  libopencv-videostab3.2:amd64      3.2.0+dfsg-4ubuntu0.1   amd64        computer vision video stabilization library
ii  libopencv-viz3.2:amd64            3.2.0+dfsg-4ubuntu0.1   amd64        computer vision 3D data visualization library
- TensorFlow : 1.14.0 ( python3 -c ‘import tensorflow as tf; print(tf.__version__)’ )
- TensorFlow : 2.3.1 :
pip3 show tensorflow
Name: tensorflow
Version: 2.3.1
Summary: TensorFlow is an open source machine learning framework for everyone.
Home-page: https://www.tensorflow.org/
Author: Google Inc.
Author-email: packages@tensorflow.org
License: Apache 2.0
Location: /home/arias/.local/lib/python3.8/site-packages
Requires: tensorboard, gast, protobuf, termcolor, absl-py, numpy, tensorflow-estimator, opt-einsum, wheel, astunparse, h5py, google-pasta, wrapt, grpcio, six, keras-preprocessing
Required-by:
Les projet github utilisés :
git clone https://github.com/iamprahladsinghnegi/automaticDetectionOfBikeRiderDrivingWithoutHelmet.git
cd automaticDetectionOfBikeRiderDrivingWithoutHelmet
git clone https://github.com/tensorflow/models
cp -r inference_graph/ models/research/object_detection/.
cp -r test1.jpg output.jpg models/research/object_detection/.
cp -r training/ models/research/object_detection/
cp automaticDetectionOfBikeRiderDrivingWithoutHelmet.ipynb models/research/object_detection/.
Installation (dans le désordre):
sudo apt-get -y install python3python-pip python-dev
sudo -H pip3 install jupyter
pip3 install numpy
sudo apt-get install python3-google-apputils
sudo apt install python3-tensorflow
pip3 install tensorflow-cpu
python3 -m pip install tensorflow
python3 -m pip install utils
sudo apt  install protobuf-compiler
python3 -m pip install matplotlib
Important :
Une fois que l’on a les deux projets il faut faire la commande ( dans automaticDetectionOfBikeRiderDrivingWithoutHelmet/models/research/ ):
protoc object_detection/protos/*.proto --python_out=.
Il faut lancer Jupyter Notebook et ouvrir celui qui est dans models/research/object_detection/.
sudo jupyter notebook --allow-root
Ensuite il faut ouvrir un navigateur sur le port 8888 , au lancement on a dans les logs le token à utiliser :
Ensuite le lien doit être du type : http://127.0.0.1:8888/notebooks/models/research/object_detection/automaticDetectionOfBikeRiderDrivingWithoutHelmet.ipynb
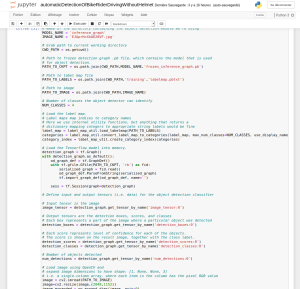
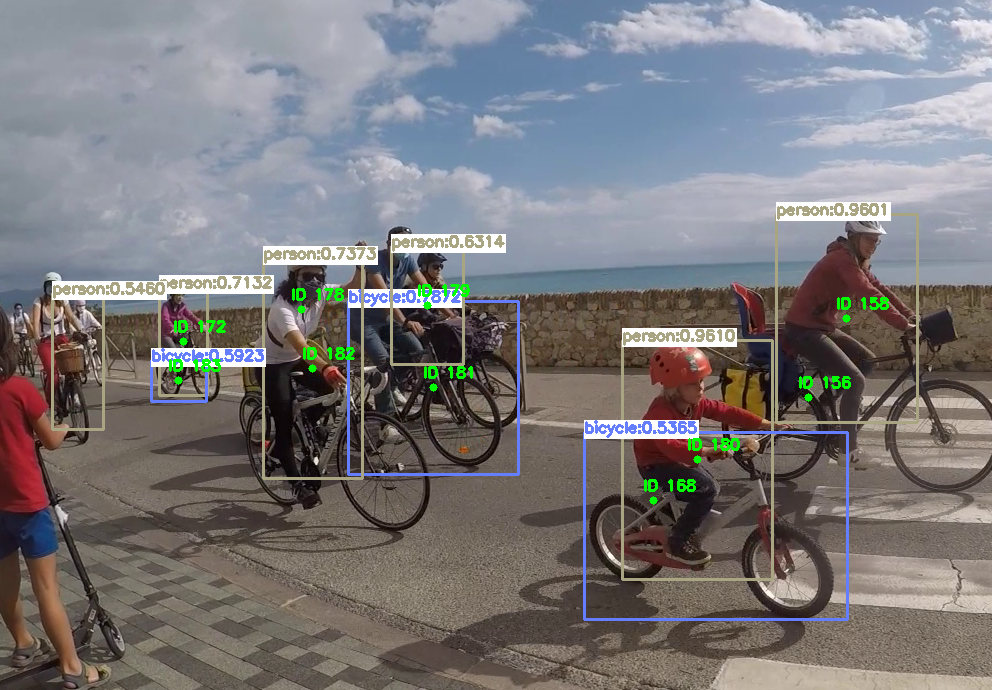
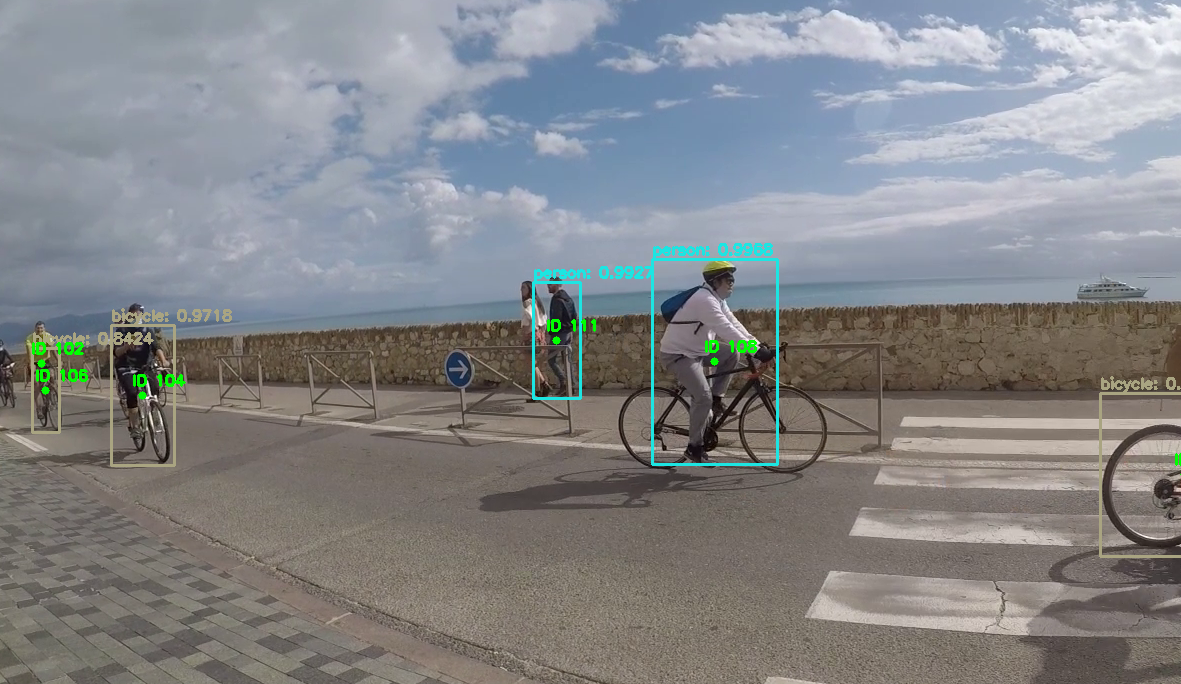
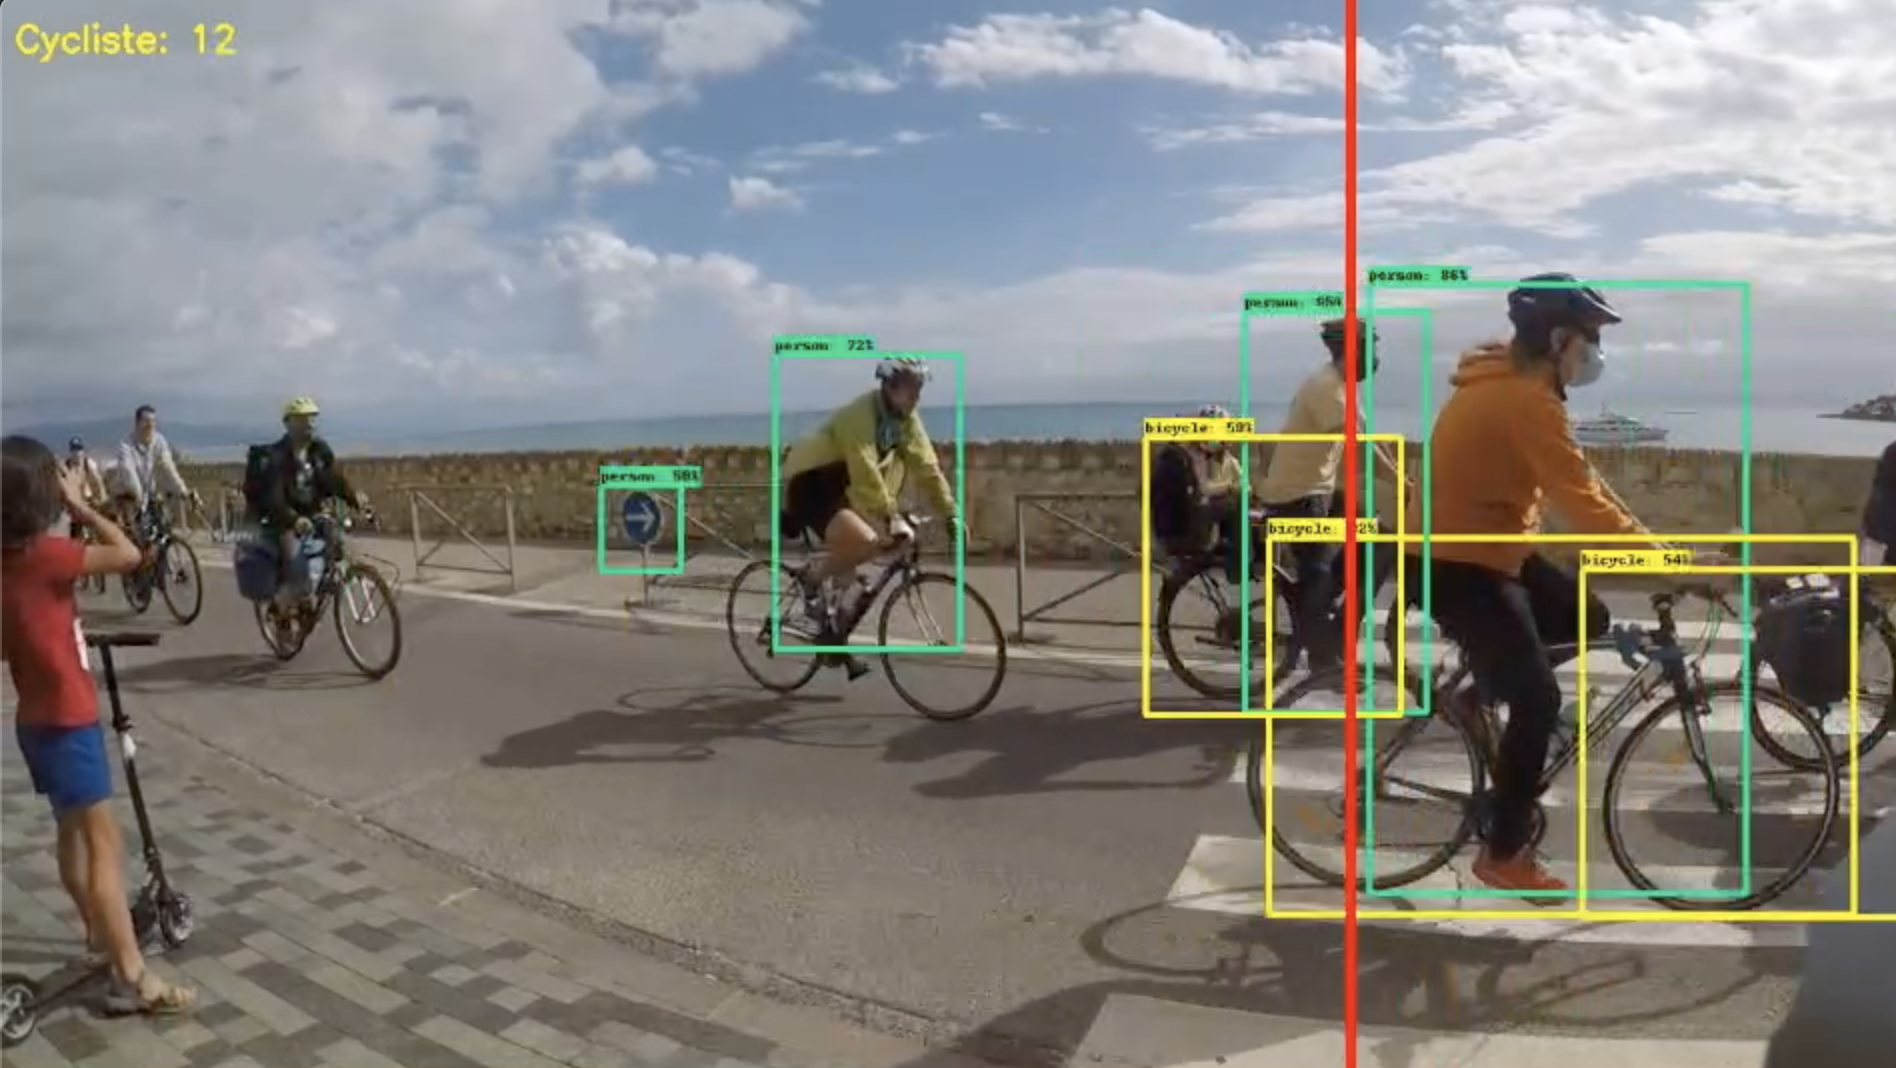
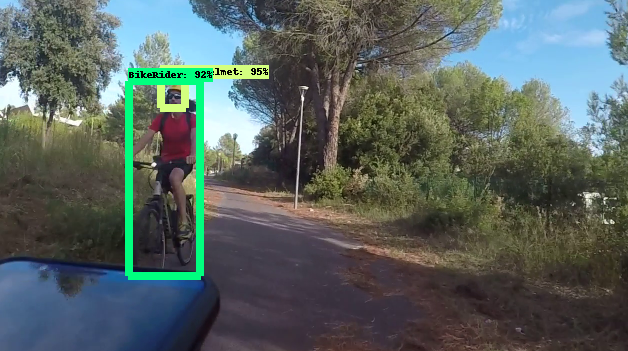
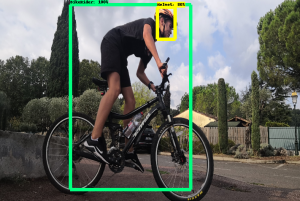
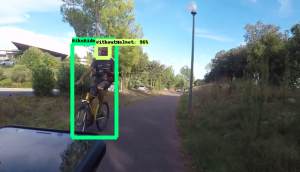
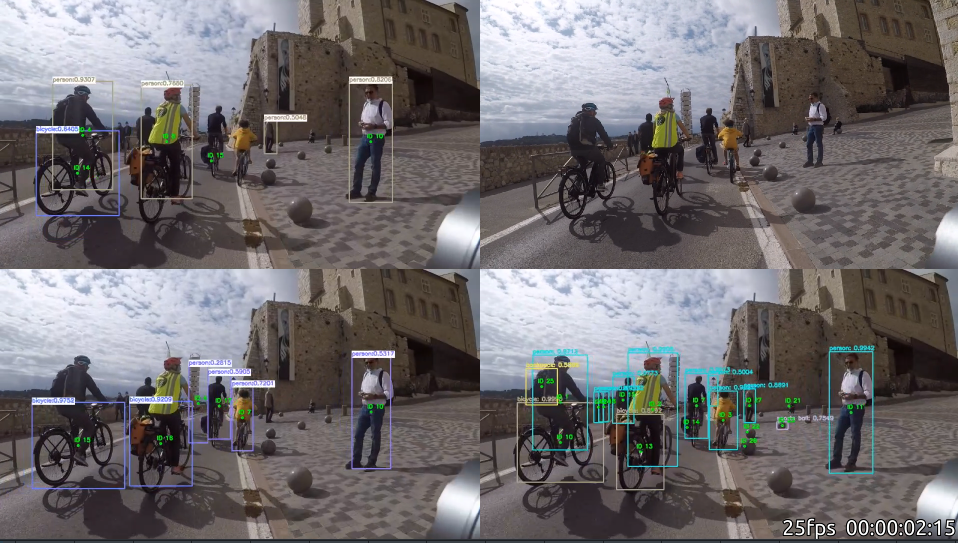
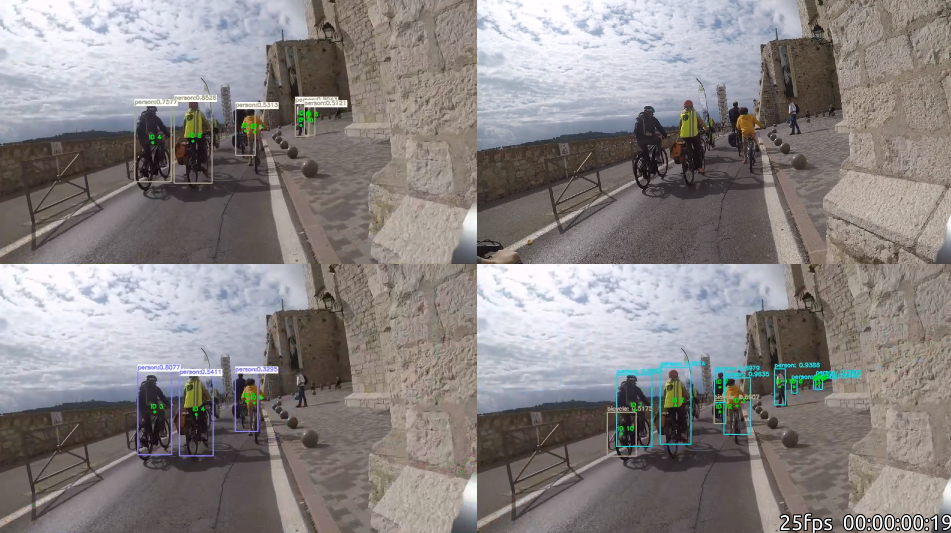
Résultat :
- Cela fonctionne sur les photos (sauf avec les vélo de face):
- Cela fonctionne très lentement sur les vidéos (surement que ma résolution est trop haute ou mon CPU pas assez puissant) . Mon CPU : Intel(R) Core(TM) i5-10210U CPU @ 1.60GHz
- Cela fonctionne sur la WebCam en direct.
Je vais donc essayer d’améliorer et de remettre au propre …

Chargement ...
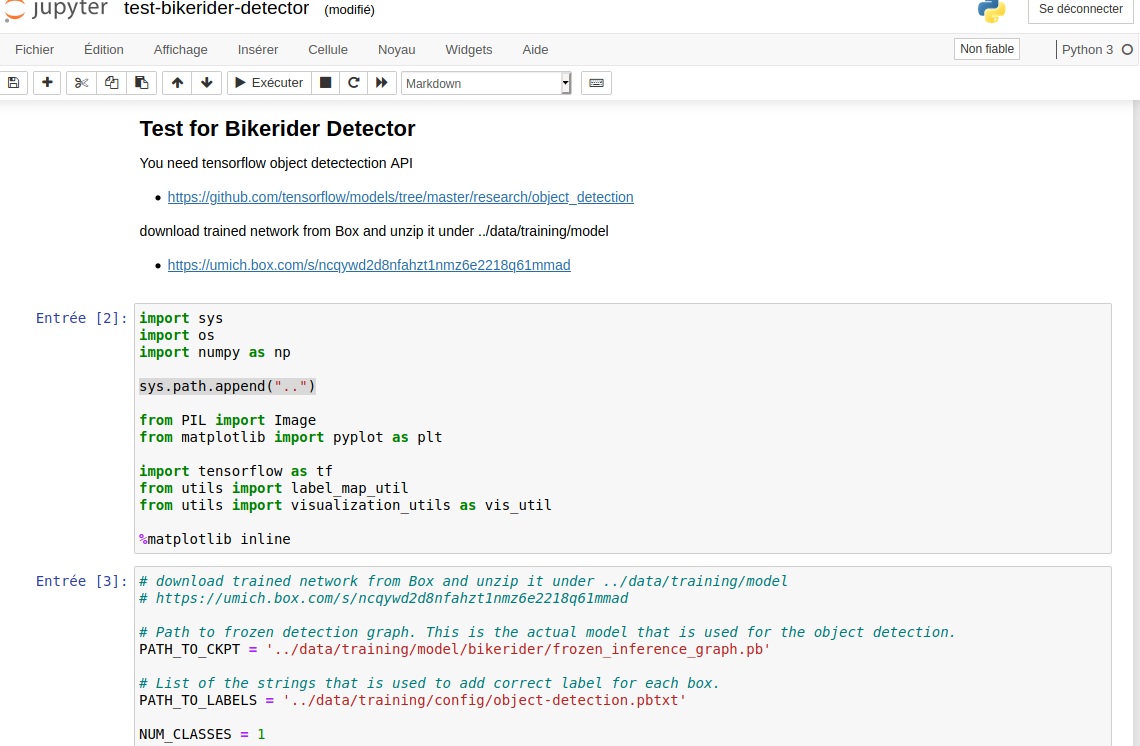
UPDATE 1:
J’ai voulu tester celui-ci de projet : https://github.com/yonghah/bikerider-detector : Bike-rider Detector.
L’installation :
# git clone https://github.com/yonghah/bikerider-detector.git
..

# python3 -m pip install pandas
..

# cd bikerider-detector/src
..

# time python3 split_train_test.py --test_ratio=0.3
0.3
train image 273 out of total 391
446 186

real	0m0,659s
user	0m0,704s
sys	0m0,719s

# time python3 generate_tfrecord.py --csv_input=../data/training/data/train_labels.csv --output_path=../data/training/data/train.record
...

real	0m2,351s
user	0m2,003s
sys	0m0,810s

# time python3 generate_tfrecord.py --csv_input=../data/training/data/test_labels.csv  --output_path=../data/training/data/test.record
...

real	0m2,158s
user	0m2,014s
sys	0m0,850s
Mais ensuite il n’y a pas de fichier train.py dans object_detection
Quand on lance Jupiter : sudo jupyter notebook –allow-root
# cp test-bikerider-detector.ipynb ~/github/automaticDetectionOfBikeRiderDrivingWithoutHelmet/models/research/object_detection/.
# cp -r data/ ~/github/automaticDetectionOfBikeRiderDrivingWithoutHelmet/models/research/.
# cd ~/github/automaticDetectionOfBikeRiderDrivingWithoutHelmet/models/research/object_detection/.
# sudo jupyter notebook --allow-root
J’ai modifier la ligne avec : sys.path.append(« .. »)
 J’ai l’erreur suivante :
NotFoundError: ../data/training/model/bikerider/frozen_inference_graph.pb; No such file or directory
Si j’utilise le fichier du projet précédent :
cp automaticDetectionOfBikeRiderDrivingWithoutHelmet/models/research/object_detection/inference_graph/frozen_inference_graph.pb ../data/training/model/bikerider/.
UPDATE 2:
J’ai changé ma version de Python afin de faire un upgrade sur tensorflow :
$ cd /usr/bin/

$ sudo rm python3

$ sudo ln -s python3.8 /usr/bin/python3

$ python3 -V
Python 3.8.0

$ pip3 install --upgrade tensorflow

$ python3 -c 'import tensorflow as tf; print(tf.__version__)'
2.3.1
Pour supprimer l’erreur : No module named ipykernel_launcher , j’ai du faire (je n’avais pas l’erreur avec la version 3.6):
$ pip3 install ipykernel
$ pip3 install matplotlib
Sur le second projet j’avais l’apparition de l’erreur : AttributeError: module ‘tensorflow’ has no attribute ‘GraphDef’ . J’ai du modifier le code :
detection_graph = tf.Graph()
with detection_graph.as_default():
  od_graph_def = tf.compat.v1.GraphDef()
  with tf.compat.v2.io.gfile.GFile(PATH_TO_CKPT, 'rb') as fid:
    serialized_graph = fid.read()
    od_graph_def.ParseFromString(serialized_graph)
    tf.import_graph_def(od_graph_def, name='')
Ensuite j’ai eu l’erreur : AttributeError: module ‘tensorflow’ has no attribute ‘Session’ . J’ai du modifier le code :
with detection_graph.as_default():
  with tf.compat.v1.Session(graph=detection_graph) as sess:
    # Definite input and output Tensors for detection_graph
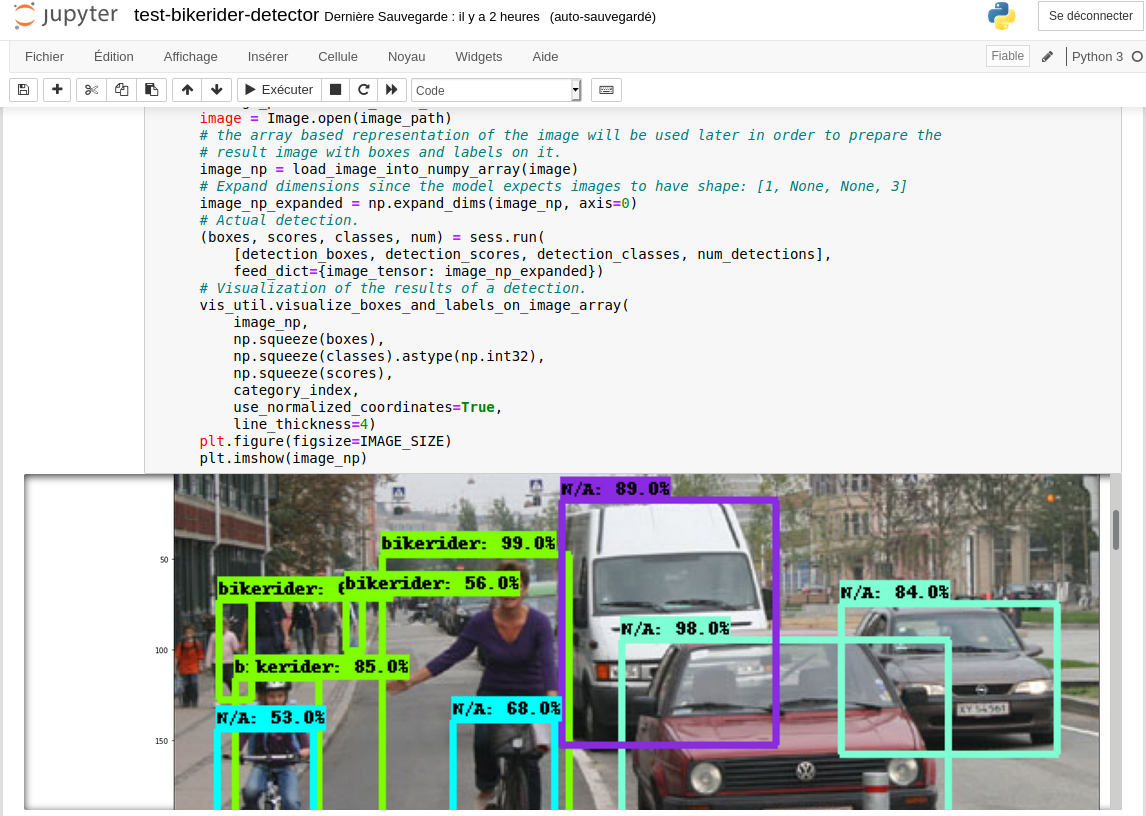
UPDATE 3:
J’ai changé le fichier frozen_inference_graph.pb par le fichier https://github.com/datitran/object_detector_app/blob/master/object_detection/ssd_mobilenet_v1_coco_11_06_2017/frozen_inference_graph.pb .
cp frozen_inference_graph.pb ../github/automaticDetectionOfBikeRiderDrivingWithoutHelmet/models/research/data/training/model/bikerider/frozen_inference_graph_2.pb
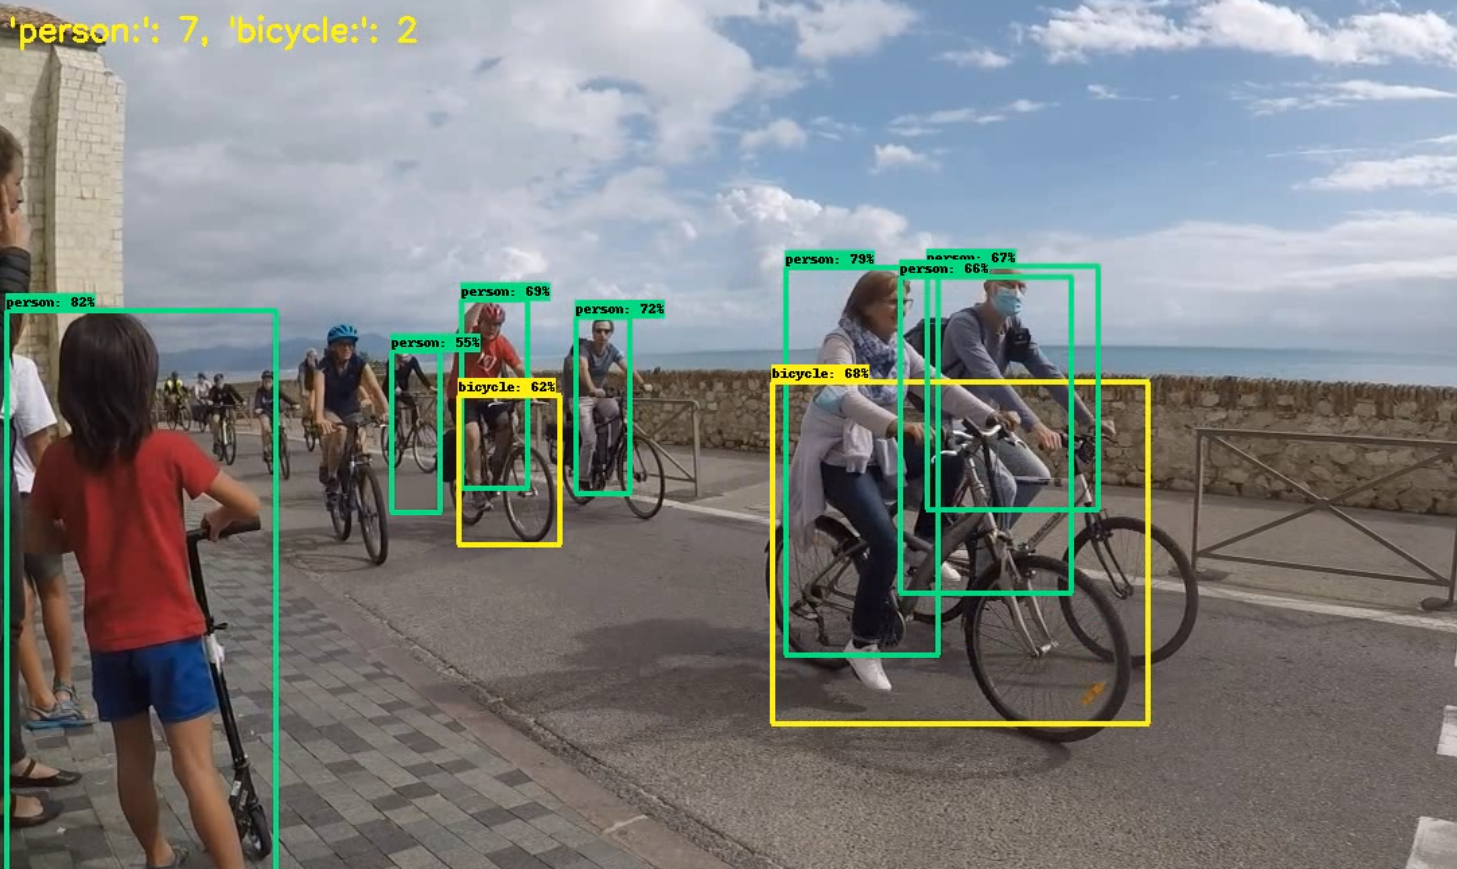
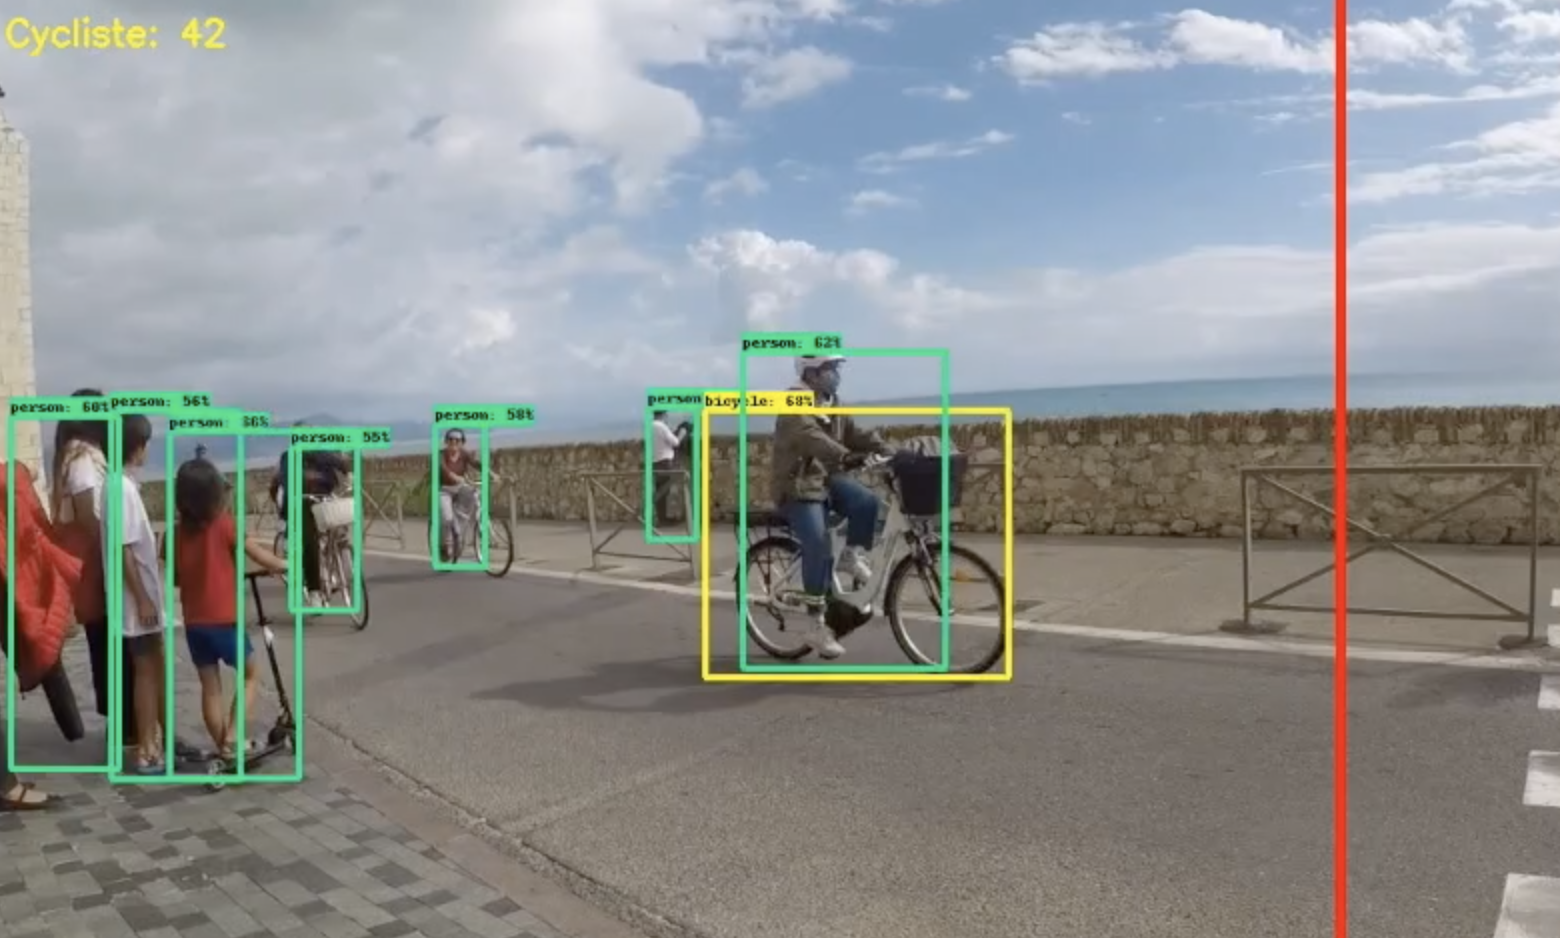
La détection était meilleure sur certaines photos …à noter que j’ai aussi modifié le code (afin de garder les deux fichiers):
PATH_TO_CKPT = '../data/training/model/bikerider/frozen_inference_graph_2.pb'

J’aime ça :
J’aime chargement…
 A suivre.